How to make your own Chrome Extension?
How amazing it would be to make your own Chrome extensions? And it is so easy that you can make your own within a few minutes by knowing a little HTML, CSS and JavaScript. You might even skip CSS if you don't like it but it'll obviously be a benefit if you want to make the extension beautiful.
Don't worry if you don't know JavaScript and HTML yet. I'll be explaining all the necessary things along the way. However, it'll be a benefit to know HTML atleast as it'll be much easier for you to understand in that case.
But what is a Chrome Extension?
Chrome extensions are small programs which can be used to enhance your browsing experience.
Most common chrome extensions are AdBlockers, Honey, Grammarly, VPNs etc. You see what is common between them? They are just small programs but having them will definitely take your browsing experience to next level.
How to make a Chrome Extension?
Making chrome extensions is as simple as making a frontend page for a website. We just need to add a small manifest.json file and the webpage acts as a chrome extension. Don't worry if you don't know JSON. Just follow the blog as I'll provide you with the necessary code snippets.
For this project, we'll be making a simple calculator chrome extension. So let's get onto it!
Making our calculator web page
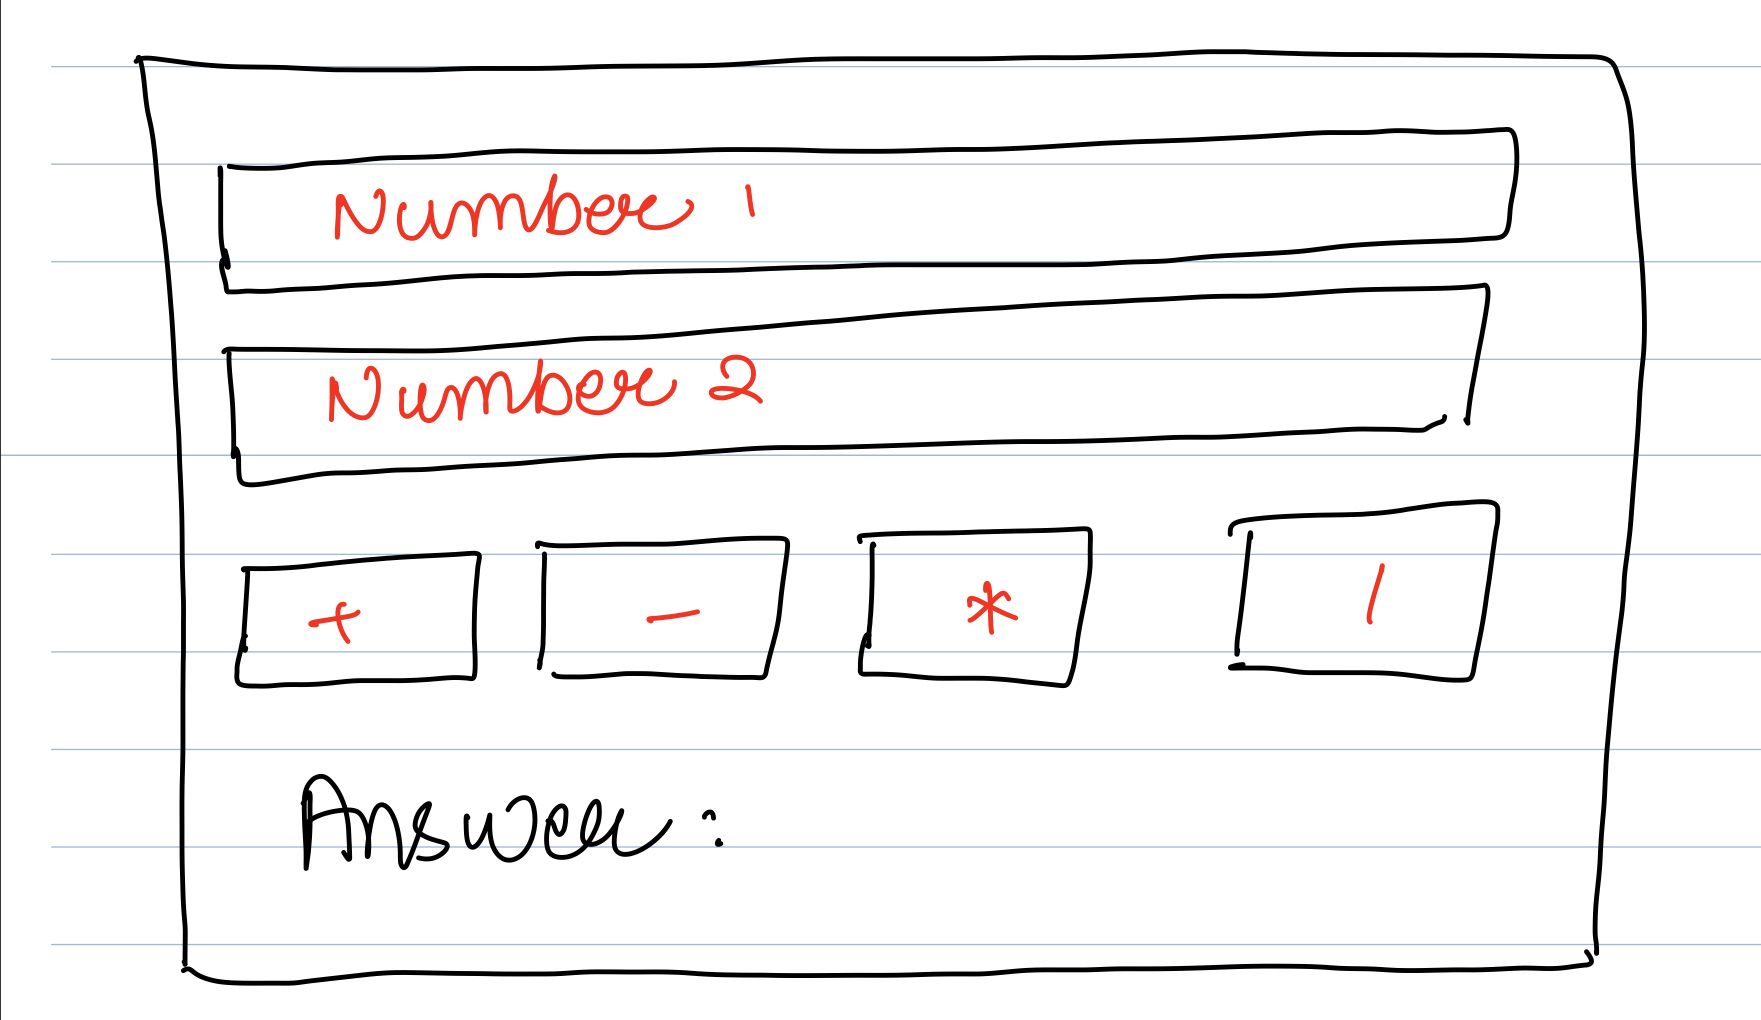
First let's make a basic diagram of hwo our calculator will look like as it'll make our things much easier.
To make things simple, I have already prepared the diagram for you.
Okay so now that we have an idea of what we want to make, let's code down te HTML for our page.
HTML
As we can see, there are various elements in the page. Let's list them down.
- 2 input fields to get the numbers
- 4 buttons which tell the operator
- 1 answer field where we'll need to display our answer.
Now let's see how we'll code them up
- Let's put the whole thing into one div.
HTML divs are something which can be used to club similar things together. You can imagine them to be a box where we put items of similar properties together.
- Now there are two input tags which take the numbers. We'll give them id num-1 and num-2 as it'll help in JavaScript.
- Also let's put 4 buttons and give each one an id of what they do.
- Also, we'll add a paragraph where we'll store our answer. Let's give this an id of 'answer'.
The resultant code will look something like this.
<!DOCTYPE html>
<html lang="en">
<head>
    <meta charset="UTF-8">
    <meta http-equiv="X-UA-Compatible" content="IE=edge">
    <meta name="viewport" content="width=device-width, initial-scale=1.0">
    <title>Calculator</title>
    <link rel="stylesheet" href="style.css">
</head>
<body>
    <div class="main">
        <input type="text" id="num-1" placeholder="Enter 1st number">
        <input type="text" id="num-2" placeholder="Enter 2nd number">
        <div class="buttons">
            <button id="plus">+</button>
            <button id="minus">-</button>
            <button id="multiply">x</button>
            <button id="divide">/</button>
        </div>

        <p id="answer">Answer</p>
    </div>
    <script src="script.js"></script

</body>
</html>This will give us this page
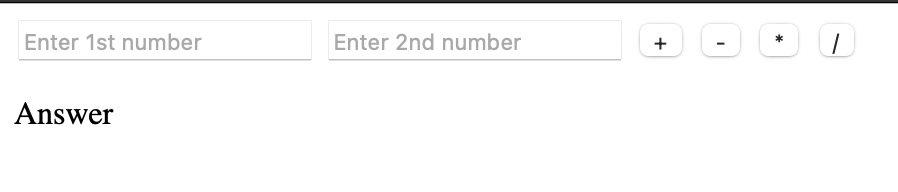
Okay now this is pretty ugly. I'll just style it down. Now this is all upto you if you want to style the extension or not. So. I won't explain the CSS. I'll just provide with the code. You can certainly use that if you want.
With some basic styling, our same webpage looks like this now

Here is the code for the styling
*{
    padding: 0;
    margin: 0;
}

.main{
    max-width: 300px;
    padding: 15px 25px;
    margin: auto;
    text-align: center;
    background-color: #FEE0C0;
    border-radius: 15px;
}

.main input{
    text-align: center;
    width: 100%;
    display: block;
    padding-top:5px;
    padding-bottom: 5px;
    margin-top: 5px;
    border-radius: 5px;
    border: none;
}

.buttons{
    border-radius: 5px;
    display: flex;
    width: 100%;
    margin-top: 5px;
    margin-bottom: 5px;
    justify-content: space-around;
}

.buttons button{
    flex:1;
    flex-wrap: wrap;
    padding: 5px 5px;
}

.buttons button:hover {
    cursor: pointer;
}Okay, so our web page is ready but for viewing purpose only🥲. So, let's add JavaScript to this. Let's create a script.js file now. As you can see in the code, I've linked the JavaScript file to the HTML already in the last third line.
The JavaScript for our calculator goes like this
function plus(){
    let num1 = document.getElementById("num-1").value
    let num2 = document.getElementById("num-2").value
    let result = Number(num1) + Number(num2)
    document.getElementById("answer").textContent += " : "+result
}
function minus(){let num1 = document.getElementById("num-1").value
    let num2 = document.getElementById("num-2").value
    let result = num1 - num2
    document.getElementById("answer").textContent += " : "+result
}
function multiply(){
    let num1 = document.getElementById("num-1").value
    let num2 = document.getElementById("num-2").value
    let result = num1 * num2
    document.getElementById("answer").textContent += " : "+result
}
function divide(){
    let num1 = document.getElementById("num-1").value
    let num2 = document.getElementById("num-2").value
    let result = num1 / num2
    document.getElementById("answer").textContent += " : "+result
}


document.getElementById("plus").addEventListener("click", plus)
document.getElementById("minus").addEventListener("click", minus)
document.getElementById("multiply").addEventListener("click", multiply)
document.getElementById("divide").addEventListener("click", divide)
Don't get confused. Let me break down the code for you. First focus on the last 4 lines. These are pretty similar right. Let me explain the first line for you. You'll automatically get the rest three.
document.getElementById("plus").addEventListener("click", plus)Here, document refers to our HTML document. In JavaScript, every HTML file is an object of the document class. Don't worry if you don't get this. Just understand that document is our HTML file. How does JavaScript know? Because we linked it earlier.
Now getElementById is a function used to access any HTML element by it's HTML id. Remeber I said earlier that ids will help us in JavaScript? I was refering to this function. In the parenthesis, we write ID of the element we want to access.
Now, addEventListener is another function. It reacts according to the events that happen with the element we have specified. In the bracket, we write the event, and the action it will take. Action usually refers to a function call. So in this case, since it is a button, the event is "click" and it calls the "plus" function when the button is clicked.
Now, let's grab the plus function declared above.
function plus(){
    let num1 = document.getElementById("num-1").value
    let num2 = document.getElementById("num-2").value
    let result = Number(num1) + Number(num2)
    document.getElementById("answer").textContent += " : "+result
}
This is the function. Here, let keyword is used to define a variable.
Let me explain the first line.
let num1 = document.getElementById("num-1").valueI think document.getElementById("num-1") must be clear to you by now.
value is also a function which gives us the value of the element. For an input tag, we use this value function to get the value stored in the input tag.
Now we store the result in a result variable. and at the end show it in the paragraph with the id "answer" with the help of textContent function. textContent function helps us to change the text contained by any element.
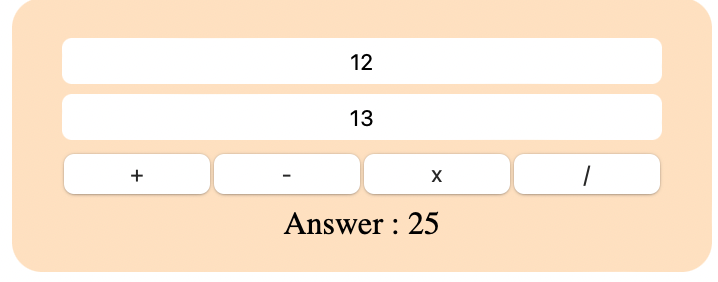
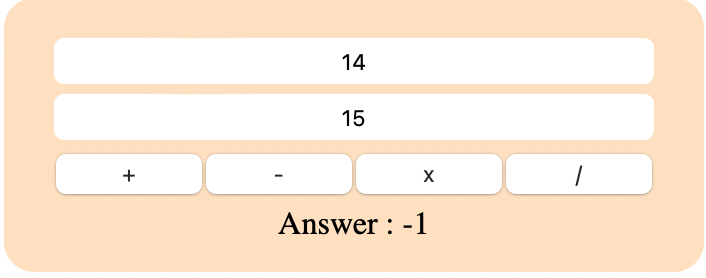
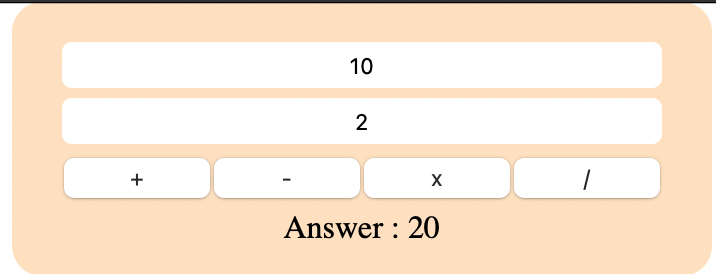
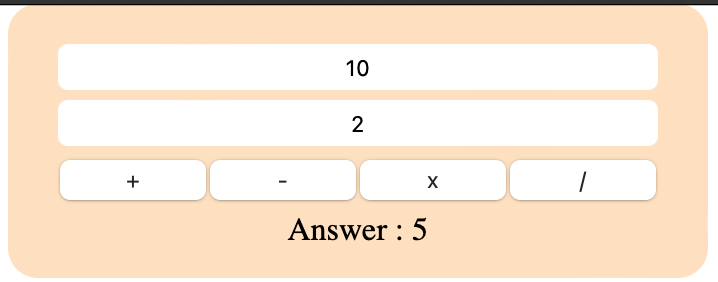
Awesome, our webpage is ready now. Let me show you some sample runs!
- Addition
- Substraction
- Multiplication
- Division
Converting the web page to a Chrome Extension
Great! Our webpage is ready. But how to convert this webpage to a Chrome extension? For this we need to add a manifest.json file in our repository. This is used by Chrome to read our file as an extension.
The content for the file is
{
    "name": "Calculator",
    "version": "1.0.0",
    "description": "Our personal calculator extension",
    "manifest_version": 3,
    "author": "Your Name",
    "action":{
        "default_popup": "index.html",
        "default_title": "Calculator"
    }
}
Just save the file and your webpage is ready to be used as a chrome extension. Yayy!
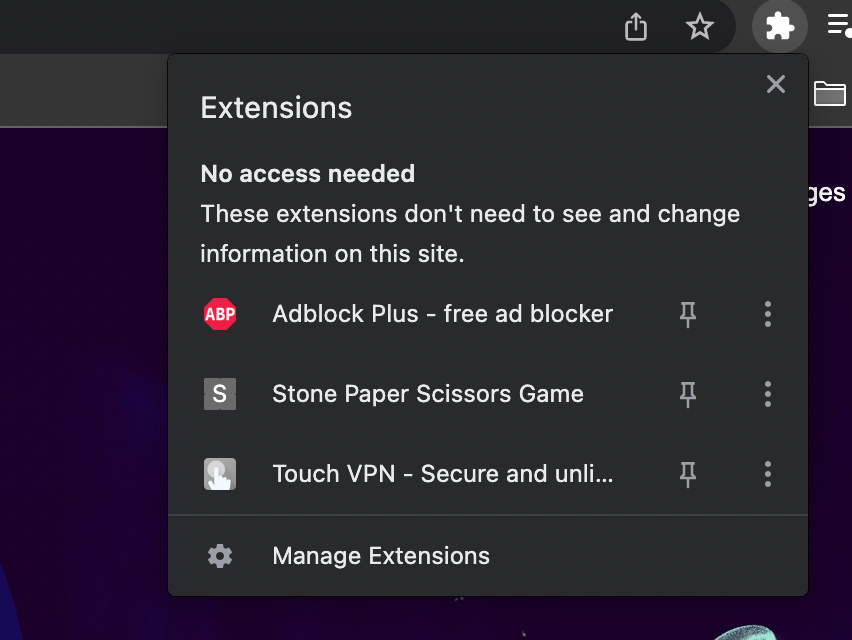
- Now go to Manage Extensions
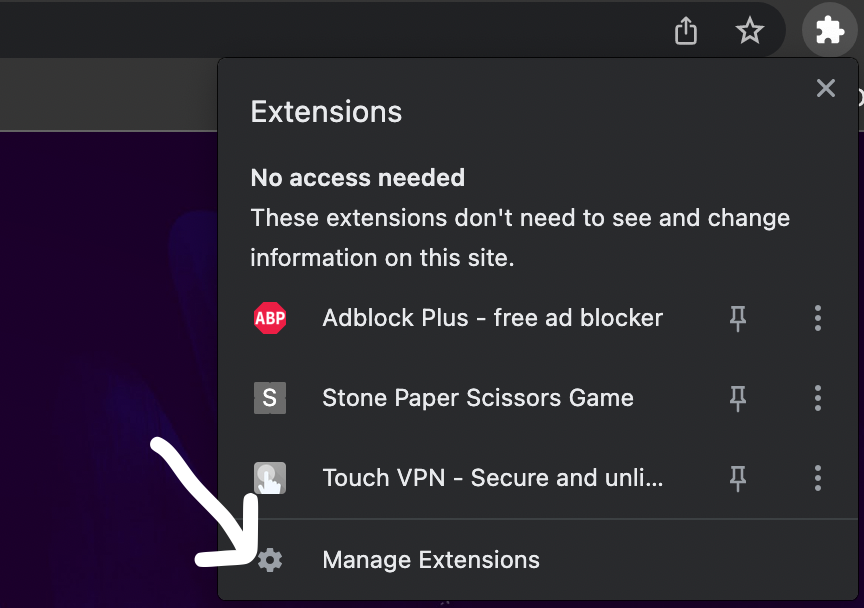
- Toggle the Developer mode on in the top right corner and then go to Load unpacked
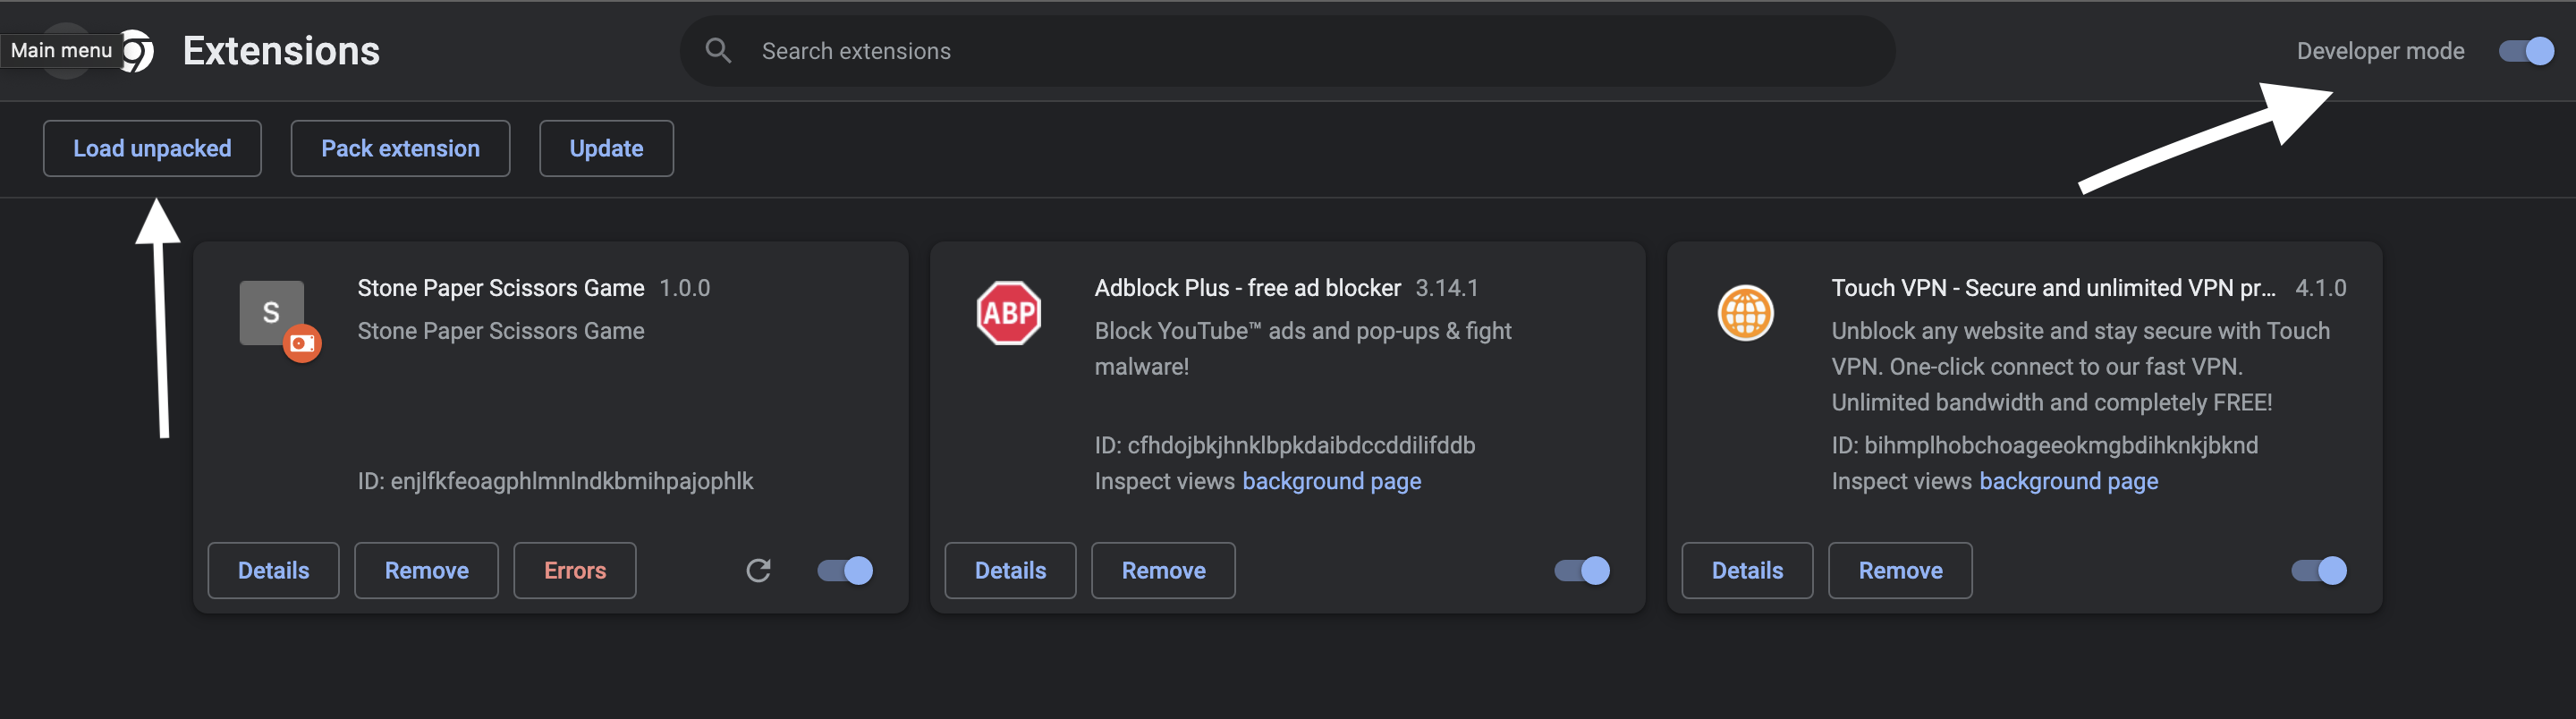
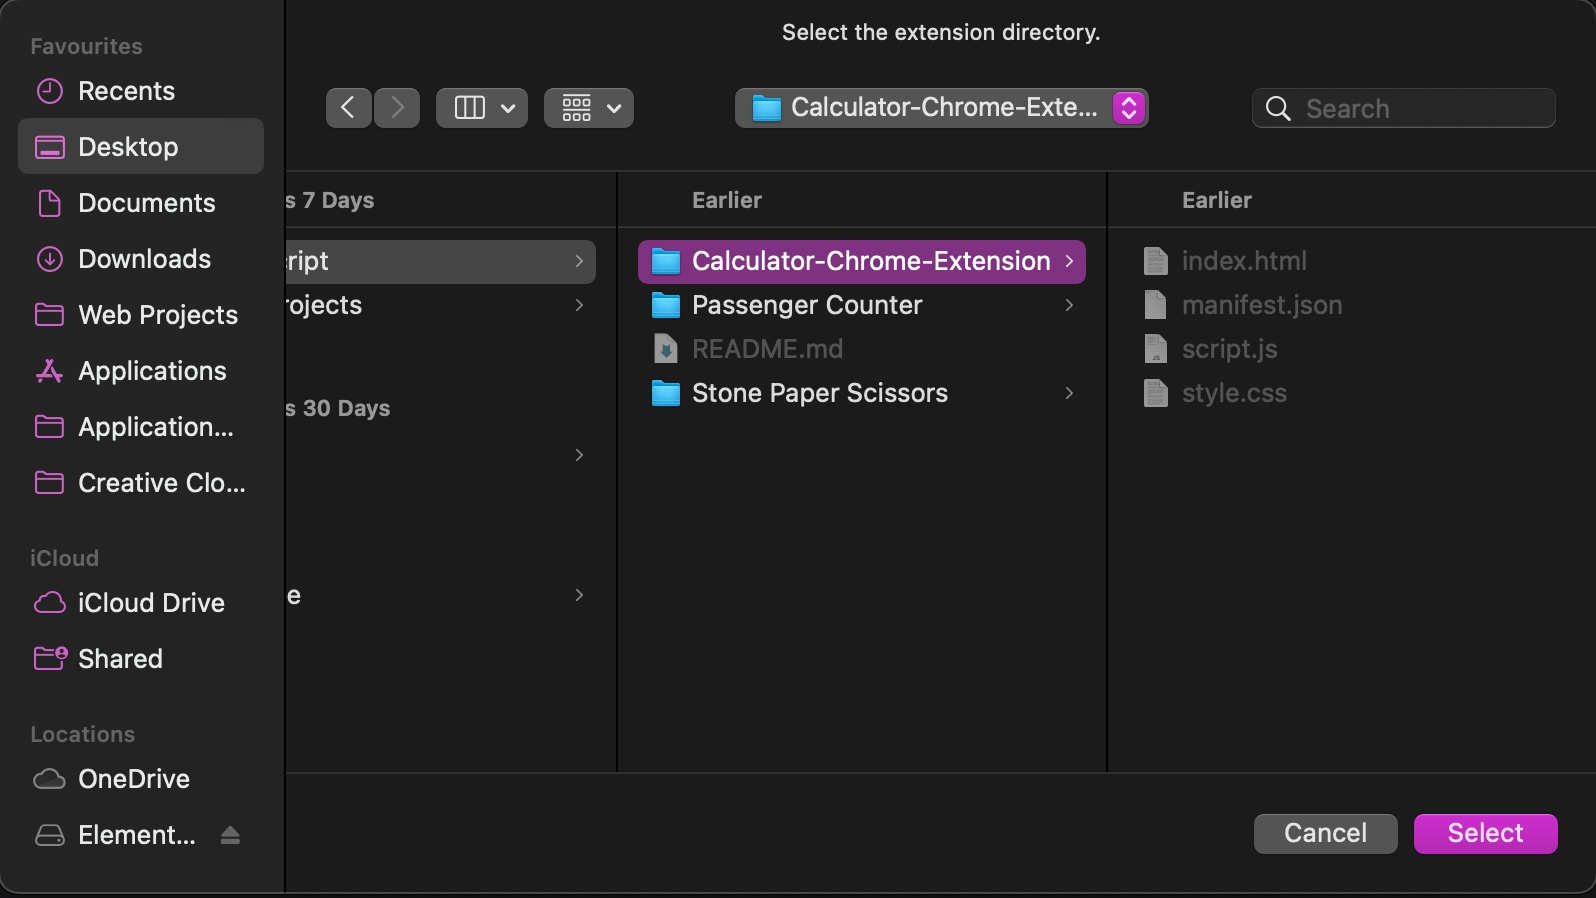
- Now select the folder where you have stored all the files of the project. Make sure no unnecessary file is present.
Now, your extension will be added. Just turn it on and start using it!
This is it for this blog. See you in the next one!


Member discussion